

Yes indeedy, yours truly risked scratches and being impaled by canes of some really old blackberry brambles. I know two places where there was an old farm that has been left to be overtaken by the wildlife. These aren't the cute thorn-less canes you can buy at your local garden center. It's not like you can move a branch out of the way, or weasel you arm in between the branches to get to the fruit, like when picking apples or cherries. And dear God, don't loose your balance, while up on tiptoe of one foot, reaching with just your fingertips to grab those giant, fat berry. You can't just put your other foot down anywhere, or rest your hand against the tree.
 |
| Blackberry bramble gone wild, growing among the plum trees |
 |
| Blackberry bramble gone wild with sage in the front and mullen in the foreground |
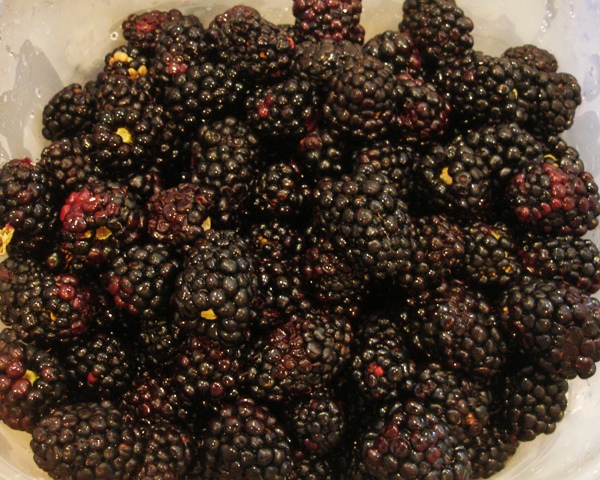
But I did it. Risked life and limb, and came home with enough berries the first trip to make 5, half pints of blackberry jam the first go round. The second go round was an added bonus. Down by the river is an old farm that is still semi maintained. There is a few fish hatcheries, and one of my favorite spots to just go hang for the day with a fishing pole and enjoy the peace and the water. We ride the horses there too. They grow field corn, sunflowers, and there is an old plum orchard.
While wandering around the plum trees, looking to see if there might be any other fruit trees (there was an old pear tree), I ran across these small saplings. Most of the other stuff that springs up out of the ground gets mowed down, but for some reason this little bunch of trees was left to grow. Loe and behold, I found a bunch that were full of these little shiny black berries.
Not knowing what they were, but obviously someone was going to the trouble to keep them irrigated, I went to picking. Surely they must be something worth having. I was really hoping they weren't something poisonous, since I didn't have any gloves with me. I figured I'd look em up when I got home. If they were bad, I'd just pitch em, but I was secretly hoping they were huckleberries. I didn't have a clue what those looked like, but knew they were something close to a blueberry.
 |
| Chokecherry trees |


I did look them up once I got home, and posted some pics to a homesteading forum I belong to, and got the confirmation they were chokecherries and made great jam. I'm game. I used the recipe from Chokecerry Jelly North Dakota University Extension Service. It was the first one to come up on my Google search with University of where ever in it's name.
Fruits

Chokecherry Jelly Made From Wild Fruit
Jelly is made from fruit juice and sugar. A gel structure will be achieved only if the mixture contains sufficient pectin. Often commercial pectin will be added to obtain this desired structure. Extraction of juice from the fruit is the first step in the preparation of fruit jelly.
- When extracting juice for pectin-added jelly use ripe chokecherries.*
- Wash the fruit in cool running water.
- Add water to cover the chokecherries.
- Bring to a boil in a covered stainless steel or enamel kettle and then simmer for 15 minutes, or until soft.
- Cool and strain through cheesecloth or a damp jelly bag.
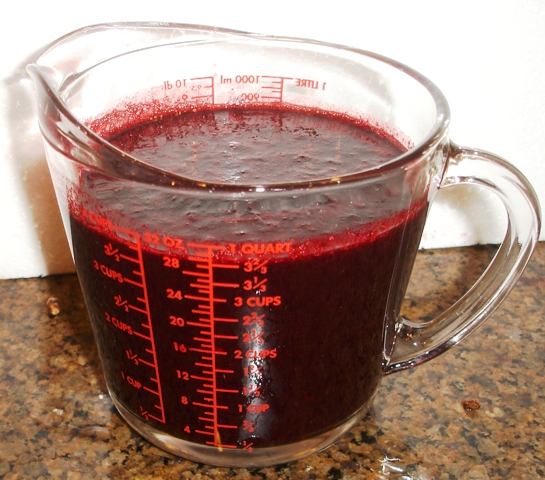
- One pound of chokecherries will give close to 2 cups juice.
* When extracting juice from chokecherries, DO NOT crush the seeds. These seeds contain a cyanide-forming compound which can cause illness or death if eaten in large amounts.
Chokecherry Jelly Recipe
- 3 cups chokecherry juice
- 6 1/2 cups sugar
- 1 box (2 pouches) liquid pectin
- ¼ teaspoon almond extract (optional)
* The use of paraffin is no longer recommended. Minnesota Extension advises the use of two-piece lids.
Source
- North Dakota University Extension Service
----------------------------------------------------------------------------------------------------------------------------------
The blackberry recipe:
This example shows you how to make either Strawberry jam or Strawberry - Raspberry - Blackberry Jam - also called Triple Berry Jam (my favorite, and everyone I give a jar to, says it has become their favorite, too!) But you can use this recipe to make any type of jam; where there is a difference, I will point it out! The yield from this recipe is about 8 eight-ounce jars (which is the same as 4 pints).
Step 1 - Pick the berries! (or buy them already picked)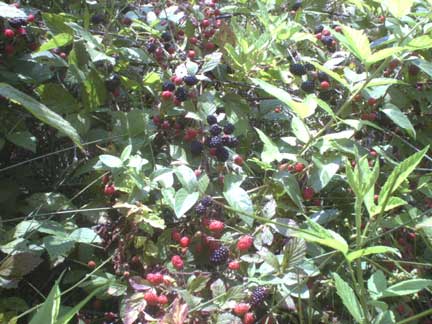
It's fun to go pick your own and you can obviously get better quality ones!
At right is a picture I took of wild blackberries - they are plentiful in late June throughout Georgia. I usually look in rural north Georgia.
I prefer to grow my own; which is really easy - but that does take some space and time.
 As mentioned in the Ingredients section; you may use frozen berries (those without syrup or added sugar); which is especially useful if you want to make some jam in December to give away at Christmas!
Above and at left are strawberries and blackberries that I picked at a pick-your-own farm. If you want to pick your own, here is a list and links to the pick your own farms.
How many blackberries?
Jam can ONLY be made in rather small batches - about 6 cups at a time - like the directions on the pectin say, DO NOT increase the recipes or the jam won't "set" (jell, thicken). (WHY? Alton Brown on the Food Channel says pectin can overcook easily and lose its thickening properties. It is easier and faster to get an even heat distribution in smaller batches. It takes about 8 cups of raw, unprepared berries per batch. For triple berry jam, I use 4 cups of mushed (slightly crushed) strawberries, 1 cup of raspberries and 1 cup of blackberries. For strawberry-only jam; you’ll need 6 cups of mushed strawberries.
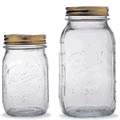
Step 2 - Wash the jars and lids
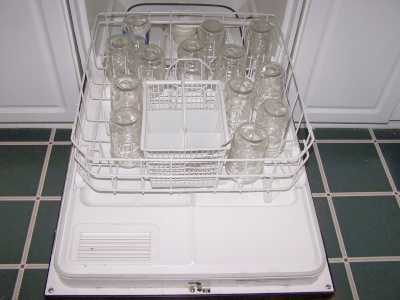 Now's a good time to get the jars ready, so you won't be rushed later. The dishwasher is fine for the jars; especially if it has a "sanitize" cycle, the water bath processing will sanitize them as well as the contents! If you don't have a dishwasher with a sanitize cycle, you can wash the containers in hot, soapy water and rinse, then sanitize the jars by boiling them 10 minutes, and keep the jars in hot water until they are used.
NOTE: If unsanitized jars are used, the product should be processed for 5 more minutes. However, since this additional processing can result in a poor set (runny jam), it’s better to sanitize the jars.
Put the lids into a pan of hot, but not quite boiling water (that's what the manufacturer's recommend) for 5 minutes, and use the magnetic "lid lifter wand" to pull them out. Leave the jars in the dishwasher on "heated dry" until you are ready to use them. Keeping them hot will prevent the jars from breaking when you fill them with the hot jam.
Step 3 -Wash and hull the blackberries!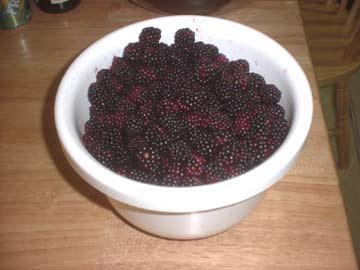
I'm sure you can figure out how to wash the fruit in plain cold water.
Then just pick off any stems and leaves.
Step 4a - Deseed the blackberries (optional)
I prefer seedless blackberry jams and jellies. The easiest way to do this is to use a food mill; either a Foley food mill (a manual hand crank device,) or a Villaware (manual or motorized) or a Roma mill. I find the seeds separate more easily if I heat the blackberries up until almost boiling, in a pan with about 1 cup of added apple juice.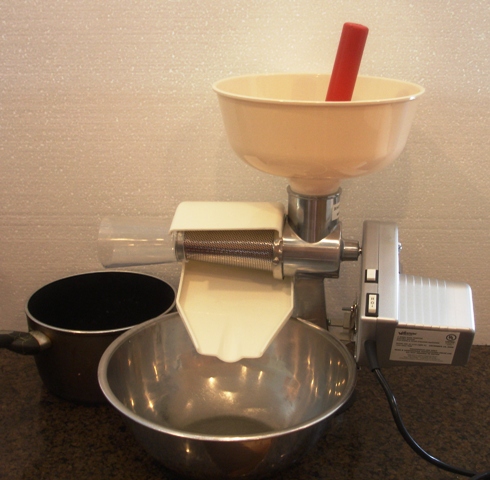
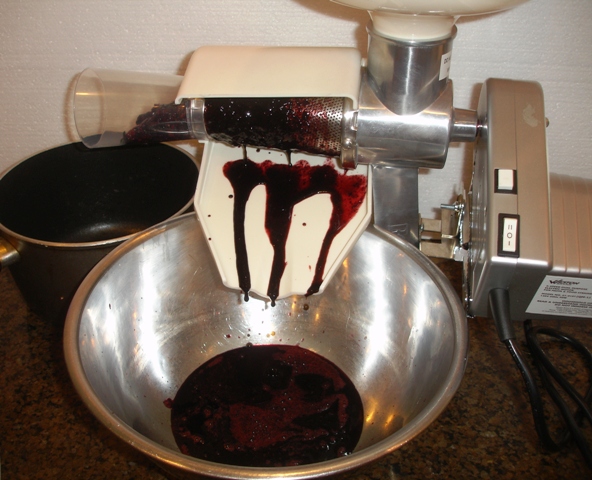
As you can see, it is really effective at removing just the seeds:
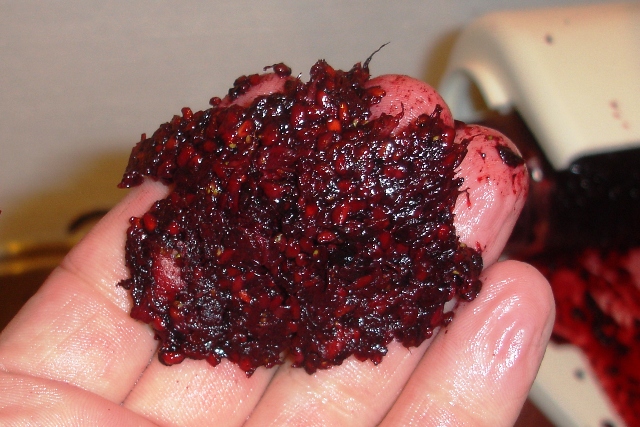
Here's how the Foley food mill (below) works. They cost about $30.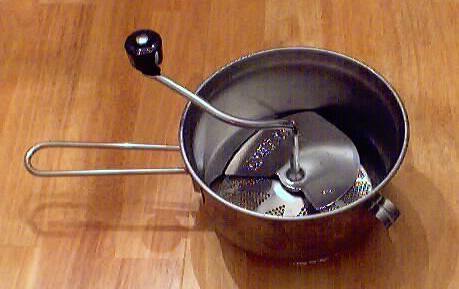
It works well for blackberries, not so well for raspberries, and no one tries to remove strawberry seeds (they're so small). I suppose you could train monkeys to pick them out, but they'd probably form a trade labor union. But I digress..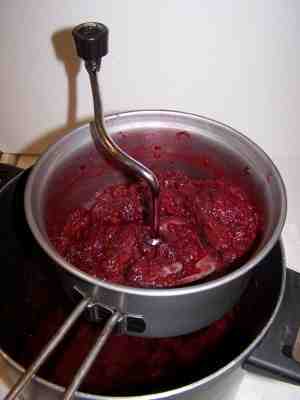
Step 4 b - Mush the berries - if you did not deseed them
If you decided not to remove the seeds, then you just mush the blackberries up a bit - not completely crushed, but mostly. Most people seem to like large chunks of fruit but crushing them releases the natural pectin so it can thicken. You'll need about 6 cups, mushed up.
Step 5 - Measure out the sugar
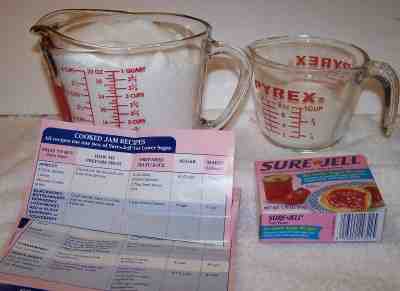
 Depending upon which type of jam you're making (strawberry, blackberry, raspberry, apricot, peach, grape, etc.) you will need to use a different amount of sugar, jam and pectin. The precise measurements are found in each and every box of pectin sold. For most fruit; like berries, with the low sugar pectin, you'll need 4 cups of sugar. With regular pectin, about 7 cups of sugar. Mix the dry pectin with about 1/4 cup of sugar and Keep this separate from the rest of the sugar. If you are not using sugar, you'll just have to stir more vigorously to prevent the pectin from clumping. This helps to keep the pectin from clumping up and allows it to mix better!
If you would rather try to make jam with no added sugar, click here for those directions!
| Type of jam |
Type of pectin to buy
| Sweetener |
| regular | no-sugar or regular | 7 cups of sugar |
| low sugar | no-sugar | 4.5 cups of sugar |
| lower sugar | no-sugar | 2 cups sugar and 2 cups of Splenda |
| no sugar | no-sugar | 4 cups of Splenda |
| natural | no-sugar | 3 cups fruit juice (grape, peach, apple or mixed) |
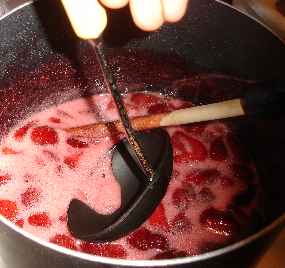
Step 6 - Mix the berries with the pectin and cook to a full boil
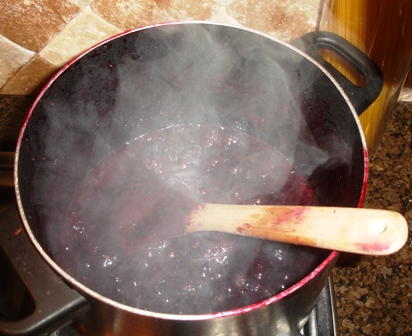 Stir the pectin into the berries and put the mix in a big pot on the stove over medium to high heat (stir often enough to prevent burning). It should take about 5 to 10 minutes to get it to a full boil (the kind that cannot be stirred away).
Why use pectin? You may run into grandmotherly types who sniff "I never used pectin!" at you. Well, sure, and their generation took a horse and buggy to work, died of smallpox and ate canned meat and green beans that tastes like wet newspapers. Old fashioned ways are not always better nor healthier. Pectin, which occurs naturally in fruit, is what makes the jam "set" or thicken. The pectin you buy is just natural apple pectin, more concentrated. Using pectin dramatically reduces the cooking time, which helps to preserve the vitamins and flavor of the fruit, and uses much less added sugar. But, hey, if you want to stand there and stir for hours, cooking the flavor away, who am I to stop you! :) Having said that, there are some fruits that have naturally high amounts of pectin (see this page for a list) and they simply don't need much or even any padded pectin.
Notes about pectin: I usually add about 25% - 30% more pectin (just open another pack and add a little) or else the jam is runnier than I like. With a little practice, you'll find out exactly how much pectin to get the thickness you like.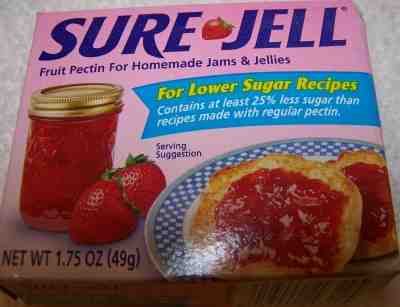
Another tip: use the lower sugar or no-sugar pectin. You can add sugar to either and it cuts the amount of sugar you need from 7 cups per batch to 4 cups or less! And it tastes even better! On the other hand; I have never had success with the No-sugar pectin without adding ANY sugar. It always turned out runny and bland. You might want to try using the low sugar or no-sugar recipe with a mixture of sugar and Splenda; sugar and white grape juice, or just white grape juice - that will cut down the sugar, but still preserve the flavor.
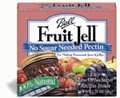
Is your jam too runny? Pectin enables you to turn out perfectly set jam every time. Made from natural apples, there are also natural no-sugar pectins that allow you to reduce the sugar you add by half or even eliminate sugar!
Get them all here at the best prices on the internet!
Get them all here at the best prices on the internet!
Step 7 - Get the lids warming in hot (but not boiling) water
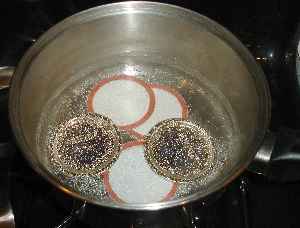 Lids: put the lids into a pan of hot water for at least several minutes; to soften up the gummed surface and clean the lids.
Need lids, rings and replacement jars?
 Get them all here, delivered direct to your home, at the best prices on the internet!
Step 8 - Add the remaining sugar and bring to a boil again for 1 minute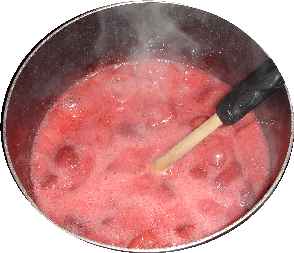
When the berry-pectin mix has reached a full boil, add the rest of the sugar (see step 5) or other sweetener, and then bring it back to a boil and boil hard for 1 minute... If you bring it back to a full boil fairly slowly (on medium heat rather than high) that will help reduce foaming.
Remove from the heat.
Step 9 - Skim any excessive foam
 Foam... What is it? Just jam with a lot of air from the boiling.
 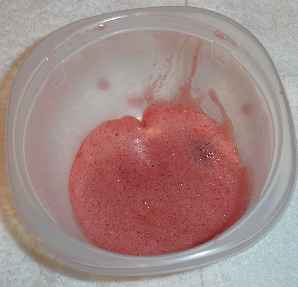 But it tastes more like, well, foam, that jam, so most people remove it. It is harmless, though. Some people add 1 teaspoon of butter or margarine to the mix in step 6 to reduce foaming, but food experts debate whether that may contribute to earlier spoilage, so I usually omit it and skim.
But save the skimmed foam! You can recover jam from it to use fresh! See this page for directions!
Step 10 - Testing for "jell" (thickness)
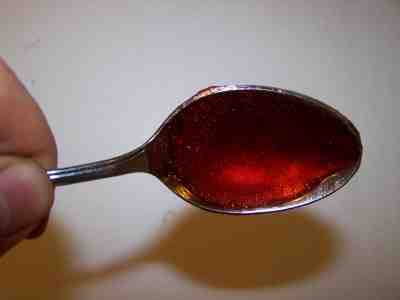 I keep a metal tablespoon sitting in a glass of ice water, then take a half spoonful of the mix and let it cool to room temperature on the spoon. If it thickens up to the consistency I like, then I know the jam is ready. If not, I mix in a little more pectin (about 1/4 to 1/2 of another package) and bring it to a boil again for 1 minute.
Notes about "set" (thickening or jell): It takes 3 ingredients for jams and jellies to set: pectin, sugar and acidity. The amount of pectin that is naturally occurring in the fruit varies from one type of fruit to another and by ripeness (counter intuitively, unripe contains more pectin). See this page for more about pectin in fruit. It takes the right balance, and sufficient amounts of each of pectin, sugar and acidity to result in a firm jam or jelly. Lastly, it takes a brief period (1 minute) of a hard boil, to provide enough heat to bring the three together. Generally speaking, if your jam doesn't firm up, you were short in pectin, sugar or acidity or didn't get a hard boil. That's ok - you can "remake' the jam; see this page!
Step 11 - Optional: Let stand for 5 minutes and stir completely.
Why? Otherwise, the fruit will often float to the top of the jar. This isn't a particular problem; you can always stir the jars later when you open them; but some people get fussy about everything being "just so", so I've included this step! Skipping this step won't affect the quality of the jam at all. I usually don't bother.
You’ll also notice that the less sugar you use, the more the fruit will float (chemists will tell you it is due to the decreased density of the solution!)
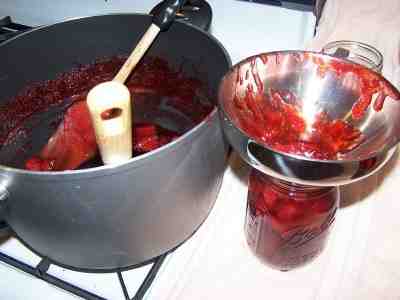 Step 12 - Fill the jars and put the lid and rings on
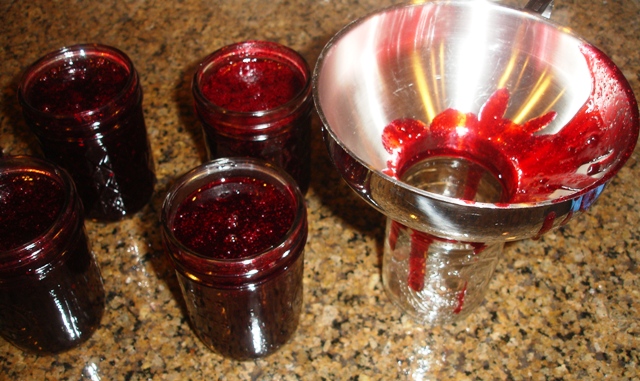 Fill them to within ¼-inch of the top, wipe any spilled jam off the top, seat the lid and tighten the ring around them. Then put them into the boiling water canner!
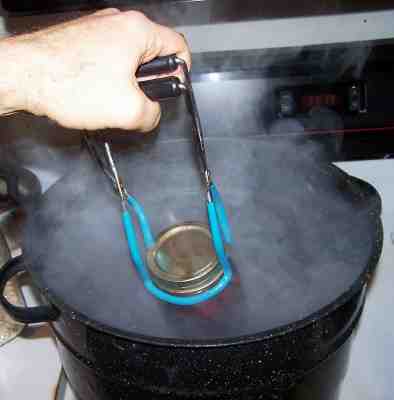
This is where the jar tongs come in really handy!
Step 13 - Process the jars in the boiling water bath
Keep the jars covered with at least 2 inches of water. Keep the water boiling. In general, boil them for 10 minutes, which is what SureJell (the makers of the pectin) recommend. I say "in general" because you have to  process (boil) them longer at higher altitudes than sea level, or if you use larger jars, or if you did not sanitize the jars and lids right before using them. The directions inside every box of pectin will tell you exactly. The directions on the pectin tend to be pretty conservative. Clemson University says you only need to process them for 5 minutes. I usually hedge my bets and start pulling them out after 5 minutes, and the last jars were probably in for 10. I rarely have a jar spoil, so it must work. But you don't want to process them too long, or the jam will turn dark and get runny. See the chart below for altitude adjustment to processing times, if you are not in the sea level to 1,000ft above sea level range.
process (boil) them longer at higher altitudes than sea level, or if you use larger jars, or if you did not sanitize the jars and lids right before using them. The directions inside every box of pectin will tell you exactly. The directions on the pectin tend to be pretty conservative. Clemson University says you only need to process them for 5 minutes. I usually hedge my bets and start pulling them out after 5 minutes, and the last jars were probably in for 10. I rarely have a jar spoil, so it must work. But you don't want to process them too long, or the jam will turn dark and get runny. See the chart below for altitude adjustment to processing times, if you are not in the sea level to 1,000ft above sea level range.
Note: Some people don't even boil the jars; they just ladle it hot into hot jars, put the lids and rings on and invert them, but putting the jars in the boiling water bath REALLY helps to reduce spoilage! To me, it makes little sense to put all the working into making the jam and then not to process the jars to be sure they don't spoil!
Recommended process time for jams in a boiling water canner.
| ||||
| Process Time at Altitudes of | ||||
| Style of Pack | Jar Size | 0 - 1,000 ft | 1,001 - 6,000 ft | Above 6,000 ft |
| Hot | Half-pints or Pints | 5 min | 10 | 15 |
Step 14 - Remove and cool the jars - Done!
 Lift the jars out of the water with your jar lifter tongs and let them cool without touching or bumping them in a draft-free place (usually takes overnight) You can then remove the rings if you like. Once the jars are cool, you can check that they are sealed verifying that the lid has been sucked down. Just press in the center, gently, with your finger. If it pops up and down (often making a popping sound), it is not sealed. If you put the jar in the refrigerator right away, you can still use it. Some people replace the lid and reprocess the jar, then that's a bit iffy. If you heat the contents back up, re-jar them (with a new lid) and the full time in the canner, it's usually ok.
Once cooled, they're ready to store. I find they last up to 12 months. But after about 6 to 8 months, they get darker in color and start to get runny. They still are safe to eat, but the flavor and texture aren't as good. So eat them in the first 6 months after you prepare them! Another trick is to keep the uncooked berries or other fruit in the freezer and make and can the jam as needed, so it's always fresh.
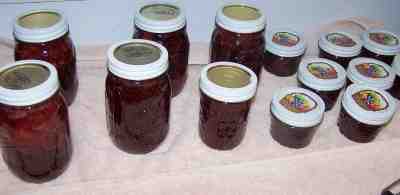
The first round of blackberry jam was a huge hit, and I have everyone who tried it hitting me up for a jar of their own. I'm thinking great Christmas presents. Taste of summer in winter. Scott had the first jar of blackberry opened and half gone when I got home from work after the first batch, and I hadn't even tried it yet. I got the cute little quilted jars for the first batch of blackberry, and the batch of chokecherry. The second batch of blackberry is in the little square half pint jars. They are so cute. I did use the pot I made the second batch of blackberry jam to make the chokecherry juice, so there will be a hint of blackberry.
Wow! You went on quite the adventure to make both jams :) I've never heard of chokecherries before. Are they mainly in North Dakota or across the Midwest? Thanks for linking up to the Country Fair Blog Party!
ReplyDeleteWe're in Idaho. I just found the recipe on the University's site.
ReplyDeleteWe are gonna take a branch down to our nursery to id...I think it is chokecherries, hubs says not. ;) Thanks for the recipe just in case. Nice to meet you via this week's Clever Chicks Blog Hop.
ReplyDeleteYou have put together a great tutorial on Chokecherry jellies and jams. Thank you for sharing with the Clever Chicks Blog Hop! I hope you’ll join us again next week!
ReplyDeleteCheers,
Kathy Shea Mormino
The Chicken Chick
http://www.The-Chicken-Chick.com
We used to pick wild chokecherries in the mountains of Colorado as a child and my dad would make syrup for pancakes with it. I don't have any access to them now, but you brought back wonderful memories! Thanks for sharing it with us at country fair blog party! I can not wait to see what you are up to on next months link up!
ReplyDelete